Rustins Limited are delighted to announce they acquired Peek Polish in March 2022 and are excited to have Peek as part of their group of brands. They describe it as a high quality multi surface premium polish with eye catching packaging that would stand out on any shelf. Robert Peek states that Rustins are the right people to carry the Peek products forward.
Read More
Yearly Archives: 2022
rustins acquires peek polish
Rustins Limited are delighted to announce they acquired Peek Polish in March 2022 and are excited to have Peek as part of their group of brands.

Rustins Head of Sales, Ian Slater, said of the news "We are excited about the acquisition of Peek. This high quality, multi surface premium polish available in a range of sizes with its eye-catching
packaging that would stand out on any shelf. We look forward to combined administration and
logistics to make it easier for merchants to stock Peek Polish and our sales team look forward to
meeting Peek customers."
Robert Peek added "I had no doubt in my mind that Rustins was the right company to carry Peek
Polish forward. Rustins and Peek have family-owned traditions that supply high quality products to
both tradesperson and household customers. I wish them every success in the future."
www.rustins.ltd
www.peekpolish.co.uk
Contact: Vince McDonagh
VMcdonagh@rustins.co.uk
+44 20 8450 4666
rcr to launch river coastal rescue in perth
After more than 20 years providing inland waterway users with marine breakdown and recovery services in the UK, River Canal Rescue is going global and launching a similar business – River Coastal Rescue - in Perth, Australia.
RCR managing director, Stephanie Horton, explains why Australia and Perth has been chosen for the Q3 launch this year: “Australia has a national volunteer-led organisation called Sea Rescue, whose priority is to respond to emergency and life-threatening call-outs. Boaters in trouble however instinctively contact Sea Rescue, so teams end up dealing with breakdown and non-emergency calls, diverting them away from potentially more urgent cases.
“Having discussed our proposition with Sea Rescue in Perth, its volunteers welcome our arrival as they’ll now be able to pass all breakdown and non-emergency calls in the region to River Coastal Rescue, freeing them up to respond to emergencies.

“We chose Perth as our first launch area because it has a high boating population sailing the coastline and accessing Rottnest Island; Western Australia’s most popular nature reserve, which welcomes half a million visitors a year, including 150,000 in private vessels. The area is also supported by Rottnest Rangers and the Boating Industry Association who are equally keen to work with us and find out more about our environmentally-friendly bilge filter, BilgeAway, which will help protect the wildlife sanctuaries frequented by boaters.”
When Stephanie and director Jay Forman visited Perth a few years ago to discuss monitoring system trials, they could see there was an opportunity to replicate their UK business. A support service was needed to relieve the pressure on Sea Rescue, plus local businesses and contractors, who because of the high volume of marine engineering and maintenance jobs, were stretched when it came to tackling minor repairs that required them leaving their base.
Boat owners were also quick to confirm they struggled to find local engineers who could help them with repairs and maintenance.
“Getting everything up and running during a pandemic has not been easy and Australia’s strict lockdown rules mean we’ve been unable to physically support the launch preparation,” explains Stephanie. “Our Australian ceo/director, Paul Stenton, has been busy recruiting the new team and as travel restrictions ease, we’ll fly to Perth to meet our newest employees.
“It’s still very much business as usual in the UK and the launch will not in any way impact the breakdown, recovery or maintenance support we give our UK customers. No matter where you are, our ethos remains the same ‘Whenever a breakdown occurs, the RCR team is here, ready to help and get you moving again’. Our heart lies, very much, in the UK and will continue to do so in the future.”
guildford steamboat rally returns
Steamboat Rally returns to Guildford, and with up to 18 steamboats of all ages & sizes already registered, the ‘Puffing a-Wey’ event promises to be truly atmospheric. One of the delights of steam boating is that it is still reasonably accessible and if not built by the owner, a 16’ open launch might cost between £5 and £8000 depending on condition.
Read More
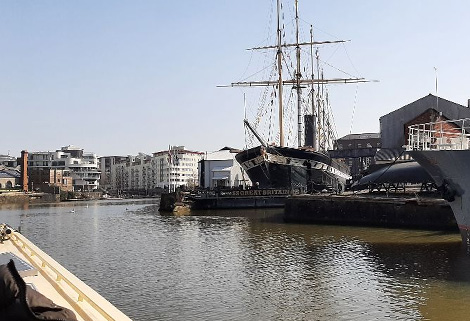
sharpness to bristol
 and First Mate Milo on their Narrowboat NutCracker")


cable to terminal post connections
why do cable/terminal post connections matter?
Figures from the marine insurance industry reveal that over 35% of fires on board small boats can be attributed to overheated electrical cables or connections. Hence the emphasis placed by the Boat Safety Scheme on the integrity of the vessels’ electrical system;
“Loose or ineffective cable connections can lead to sparking or increased resistance and overheating of the cable. As a result, the risk of fire or explosion is increased.”
Fires require three things – oxygen, fuel, and a source of ignition. An electrical fire begins when part of the circuit (either the conductor within a cable, its crimp lug, or its connection to the terminal post) becomes hot enough to act as the source of ignition for the fuel (the plastic cable insulation). It seems sensible that we should try to understand why conductors, crimps, or connections become so hot. Then we can take practical steps to guard against such situations occurring.
When an electrical current flows through a resistance heat is generated and the temperature rises until it reaches a point where the heat which is lost to the surroundings equals the heat being generated. The amount of heat generated is proportional to the square of the current flowing. That is, if the current is doubled the heat generated is four times greater, if the current is three times greater the heat generated is nine times greater, and so on. Clearly we need to pay the greatest attention to cables and connections carrying high currents for significant amounts of time, such as those serving the battery, inverter, pre-heaters and alternator.
Furthermore, although the heat generated by the resistance of the conductor within a cable is distributed evenly along the length of the conductor the same cannot be said for the cable lug or its connection to the terminal post. Here the resistance is localised and thus the temperature rise for a given current will be higher. It is for this reason that the majority of electrical fires begin around the cable connection point.
There is a considerable body of easily available (and consistent) information to help in choosing the correct size and specification of cable for any given application. The same comment applies to choosing the cable lug and, more importantly, making the crimp connection to the cable conductor.
However when it comes to the final link in the chain, connecting the cable lug to the terminal post, things are very different. The advice itself is just as plentiful, the problem is that it is inconsistent and often contradictory. Once again we need to understand what is going on in order to make informed judgements.
The reason that cable connections rise in temperature when a current flows is the inescapable presence of contact resistance. The three principal contributors to contact resistance are contamination, oxidation, and contact area/clamping force.
contamination
Contamination of a connection can be due to a film (or localised spots) of non-conductive material such as grease or paint, preventing good electrical contact between the joint surfaces, or to small particles of grit etc which effectively keep the surfaces apart. Good cleaning practices at the time the connection is being made can effectively deal with contamination.
oxidation
All metals form a thin layer of oxide on exposure to air and moisture. These oxides have a much higher resistance than the metals themselves and their presence in a joint will increase the contact resistance. Once again good cleaning practices can initially remove the oxide film but unless the joint is properly made air and moisture can penetrate it over time, reforming the oxide layer and increasing the contact resistance.
contact area/clamping force
Surfaces which to the eye appear smooth are nevertheless microscopically rough. Under magnification surfaces resemble a landscape of peaks and hollows. When two metal surfaces touch the actual metal-to-metal contact area is restricted to those points where the peaks touch. In electrical theory these small areas of contact are called ‘asperities’. As we increase the force clamping the joint together the number of asperities (and their area) increases and the resistance of the joint falls. The resistance of a joint is therefore heavily dependent on the clamping force.
In a bolted joint, tightening the nut stretches the bolt a small amount, like pulling on a stiff spring. This tension results in an opposing clamp force that holds the two sections of the joint together. Unfortunately achieving and maintaining an acceptable clamp force is a complex matter.
The traditional method of obtaining an acceptable clamp force is to tighten the nut onto the terminal stud using a torque wrench. Conventional wisdom says that the clamp force is directly related to the applied torque. The difficulty with this approach is that variations in friction between the nut and terminal threads, not to mention the load bearing face of the nut and surface it bears upon, can greatly affect the actual clamping force achieved. Some studies report that even under ideal laboratory conditions these two factors alone were responsible for more than a 25% variation in clamping force.
A further problem arises because threaded fasteners naturally tend to loosen under vibration. Although friction between the parts of a properly clamped joint initially resists movement of the separate components there comes a point where, if the vibration is strong enough, relative movement of the parts will begin to occur. This relative motion generates an off-torque, which is proportional to the thread pitch and to the clamping force. If the friction under the nut bearing surface is overcome by the off-torque, the off-torque then rotates the nut or bolt such that it loosens, reducing the clamping force which in turn allows the contact resistance to increase.
As if this were not enough the surface asperities continue to slowly bed down during the first few days after the joint is first made (a process known as embedment). This reduces the clamping a little making it more prone to vibration loosening.
Any method of making cable to terminal connections must bear these factors in mind at all times. In addition the method should be one which is practical, consistently achievable, and maintainable on board a boat.
my method of connecting a cable to a terminal post
The washers and nuts which we add to complete the joint are collectively known as the ‘structure’. Extensive testing over many decades in hundreds of engineering establishments and universities has led to a thorough understanding of the mechanisms of loosening, however the result has been a plethora of recommended structures, each tailored to a specific situation. I stick to the principle that the simpler a structure is then the greater my chance of installing it correctly and reliably in practice. The process and structure I employ was taught to me by my father (who was a marine radio operator in the days of morse code and battery powered transmitters consuming kilowatts of power).
1. Clean the lug and the terminal with a clean rag and a grease removing solvent. Father sloshed tetrachloroethane around with abandon but that is a chemical regarded with horror in today’s more enlightened times. I use acetone.
Since the majority of current flow between the lug and the terminal is largely through their mutual contact at the ‘bottom’ face of the lug it is essential that these faces are clean and free from contamination/oxidation. (Some current may flow through the nut/ terminal post route but this is normally a higher resistance path and hence any current flow will be lower.) The objective of cleaning is to rid the surfaces of insulating grease and, in particular, to remove any particles of grit or dirt which may prevent the two faces from making full contact with each other.
2. Rub a little Vaseline onto both surfaces and then clean them again, this time using either a twist of fine steel wool or, the modern alternative, a scouring pad. Wipe the faces clean with just the cloth (no solvent this time).
The objective is to remove oxidation and to leave a very thin film of Vaseline on each surface. Vaseline is electrically conductive and moisture repellent so its presence over the contact area helps to lower resistance and to prevent future oxidation of the joint due to moisture ingress.
3. Place the lug over the terminal. Many experts advocate the use of a plain washer between the two surfaces but I do not use one. In this context it seems to me that a washer merely doubles the potential sources of contact resistance i.e. lug to washer and washer to terminal.
4. Fit a plain washer on top of the lug. To ensure that the washer seats properly and that the washer/lug interface is protected against corrosion and/or oxidation the washer should be cleaned before use as set out in step 1. I do not use either a serrated washer or a split washer in this position since they invariably gouge into the lug, cutting through the tin plating which is there to prevent oxidation of the underlying copper.
There is a general consensus that this component of the structure should be a ‘Belleville’ washer rather than a plain washer. When a Belleville washer of the correct specification is correctly installed they have been shown to offer superior anti-loosening performance. A Belleville washer has a very shallow cone shape and works by acting a very strong spring, maintaining the clamp force whilst taking up small dimensional changes in the joint caused by embedment or loosening. To work correctly, the washer needs to be compressed such that it is almost (but not quite) flat. The problem for the average user is that considerable technical knowledge and expertise is required to select the correct specification of the washer and to then match the compression of the washer to the desired clamping force of the joint.
As a consequence of these practical difficulties I choose instead to use the plain washer on top of the lug. A plain washer distributes the clamp load applied by the nut and minimises distortion of the lug as the joint is tightened. Without the washer the lug could potentially ‘cup’ lifting its edges away from the terminal face reducing contact area and thus increasing contact resistance.
5. Fit a new (i.e. unused) Nyloc nut onto the terminal post. It is widely acknowledged that double nuts perform best in vibration tests however I opt for the next best performer, the humble Nyloc nut. I do not use a serrated or split washer under the Nyloc nut since it serves only to tie the plain washer and the nut together and thus does not confer any protection against rotation of the plain washer/lock washer/nut assembly. Hence it does little, if anything, to improve anti-loosening performance.
A double nut installation consists of a ‘jam nut’, typically about half the height of a standard nut, fitted below the standard top nut. The jam nut is tightened to a quarter of the full torque before the top nut is fitted and tightened to the full torque. This effectively pulls the terminal threads up through the jam nut into contact with the upper surface of the jam nut threads. At the same time the terminal threads are forced into contact with the lower surface of the top nut threads, jamming the two nuts together and increasing their combined friction with the terminal threads to improve the anti-loosening performance.
As with the Belleville washer the arguments against using double nuts are purely practical ones. To work correctly the nuts need to be tightened to specific torques matched to the size and material of the terminal post. In addition, once tightened, the thinner jam nut must not be allowed to rotate as the top nut is tightened in its turn. This requires dexterity with using two spanners simultaneously, often in a confined space.
6. Torque the Nyloc nut to 80% of the terminal manufacturer’s recommendation.
As mentioned earlier the relationship between applied torque and clamping force can vary by as much as ±25 , and is dependent on several factors which are not easy to quantify or control. By using the 80% torque figure we ensure that our actual clamp force is between 60% (80% x 0.75) and 100% (80% x 1.25) of the maximum recommended, sufficient to ensure that we have achieved a good resistance to vibration loosening of our joint without incurring the risk of stripping the terminal threads. If we were to use the full torque value there is a possibility that the actual clamp force could be as high as 125% (100% x 1.25) which would almost certainly cause damage to the terminal and could lead to early failure of the joint.
In summary the structure I describe is shown below.

connecting multiple cables to one terminal
In some cases it is expedient to fit multiple lugs to one terminal. The question that is often asked is ‘Does the order matter?’ Take the case of three lugs as an example.

First, let us assume that the resistance at each of the junctions is the same, that one Ampere of current crossing the junction produces one unit of heat, that Lug 1 carries 5 Amps, Lug 2 carries 30 Amps, and Lug 3 carries 100 Amps.
• The current across Junction 1 is 5 Amps and the heat generated is 5 Units.
• The current across Junction 2 is 35 Amps (the 5 Amps of Lug 1 plus the 30 Amps of Lug 2), the heat generated is 35 Units.
• The current across Junction 3 is 135 Amps (the 5 Amps of Lug 1, plus the 30 Amps of Lug 2, plus the 100 Amps of Lug 3), the heat generated is 135 Units.
The total heat generated in the terminal is thus 175 Units (5 Units + 35 Units + 135 Units).
Now imagine that the terminals were connected in the reverse order that is, Lug 1 carries 100 Amps, Lug 2 carries 30 Amps, and Lug 3 carries 5 Amps. The calculation now becomes;
• The current across Junction 1 is 100 Amps and the heat generated is 100 Units.
• The current across Junction 2 is 130 Amps (the 100 Amps of Lug 1 plus the 30 Amps of Lug 2), the heat generated is 130 Units.
• The current across Junction 3 is 135 Amps (the 100 Amps of Lug 1, plus the 30 Amps of Lug 2, plus the 5 Amps of Lug 3), the heat generated is 135 Units.
The total heat generated in the terminal is now 365 Units (100 Units + 130 Units + 135 Units), more than double that generated in the previous case. In other words, the heat generated in the terminal, and therefore the temperature it attains, is clearly dependent on the order in which the lugs are stacked.
For the sake of peace of mind I avoid the use of multiple lugs whenever possible and never exceed three at the maximum. The lugs should always be stacked in order of the currents they carry with the highest current at the bottom of the stack. Washers between the lugs should be avoided since they increase the number of junctions in the connection and thus increase the heat generated.
inspection and maintenance
Unfortunately creating a good joint is not the end of the matter. To maintain confidence in the integrity and safety of our connections we must institute an inspection routine. There are three enemies which must be guarded against.
Embedment will reduce the clamping force and increase the contact resistance. Embedment begins the moment clamping force is applied to a joint but its effect is largely complete after two or three weeks.
Vibration loosening also reduces the clamping force and increases the contact resistance. Obviously it is most likely to occur during the times that the vessels engine is run, irrespective of the age of the connection.
Oxidation is an ever present danger and can occur at any point during the connections lifetime.
1. To detect and correct the effect of embedment I check the nut torque every couple of days for the first week and then once a week for the second, third, and fourth weeks.
2. To detect and correct the effect of vibration loosening I check the nut torque before and after every engine run during the first month. I have never found any case of vibration loosening but if it were to occur the only recourse is to adopt a more robust/complex method of anti-vibration fixing such as the double nut, Loctite, or castellated lock nuts.
Once satisfied that the joint(s) are not loosening the connection process should be completed by treating them as follows;
3. Wipe with a clean rag to remove dirt particles.
4. Paint a thin line from the top of the terminal down the thread, over the nut, over the washer, over the lug and onto the terminal base.
Once this is done the integrity of the joint can be assessed quickly and easily at any time. If the line remains intact then no relative motion of the component parts has taken place and we can deduce that it is extremely unlikely that any loosening has occurred.
5. Then coat the whole assembly with a thin layer of Vaseline.
The purpose is to prevent the ingress water and contaminants into any of the joint interfaces.
6. Thereafter I check the joints by visually checking the painted lines once every three or four months. Occasionally, when the opportunity occurs and the cable has been carrying full current for a reasonable time, the joint can be felt to check if it is hot/warm.
I freely admit that my method of making, inspecting, and maintaining connections is only one among many that could be used but it is simple and practical and has served reliably over seven years of constant live-aboard use. To date there have been no fires and no signs of heat damage around any of the connections. (Touch wood.)
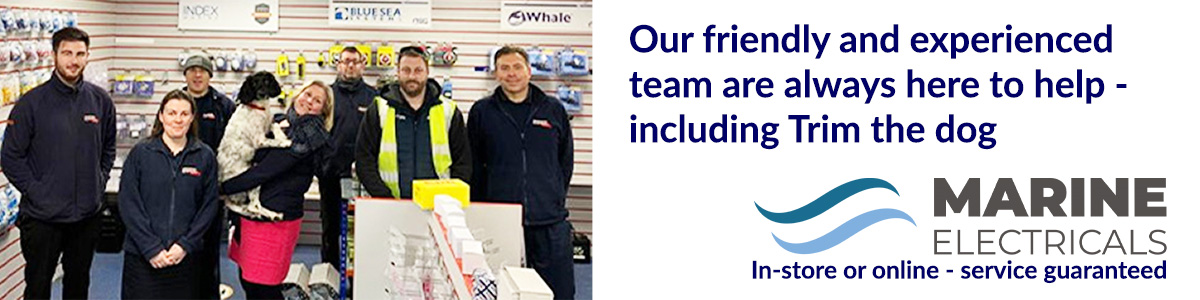
marine electricals

Now you know who we are, and where you can find us, I am going to highlight a product we sell that doesn’t quite fit in the Marine Electrical bracket, Acoustic Insulation. Life on board can get noisy at times, the engine or generator running can be distracting, or you can hear noises at night from adjoining cabins and from outside. The easy way to alleviate these annoying sounds is by using Acoustic Insulation, and we have two very good examples that you can use for many applications on your boat, from the engine compartment to the wheelhouse, to basically anywhere you need to dampen noise. It comes in a Black or a silver and white finish, one of its key benefits is the fact that its very lightweight, a key factor to consider on a boat. It is also compressible, it's not solid construction - meaning it can easily be stuffed into any gaps or spaces where noise is an issue. Not only is it very adaptable in its uses, its also a very good sound absorber. Both are easily bonded to most surfaces, and both are a very good sound proofing solution for Marine purposes. They are both manufactured by 3M which I’m sure you have all heard of, which highlights the quality of the product.
The silver version is linked here
The Black version is found here
We are called Marine Electricals, so I guess I had better highlight at least a few of our actual electrical products! As good a place as any to start would be our Marine Cables.
marine cables
For anyone new to the world of Marine Electricals, there are two options for cables on your boat. Firstly there is the Tinned variety. Tinned Copper cable is an ideal solution for wiring on a boat, as it is coated in a thin layer of Tin which protects the copper from the sort of corrosion that exposure to humidity and moisture can lead to. Although Tinned cable is the more expensive option, it is in the long run the best option for Marine applications due to the constant proximity of moisture. Of course for internal applications this should not normally be an issue, in which case non-Tinned cable would be just fine.
We have a great range of both Tinned and Non-Tinned cable always in stock. We only buy British made Oceanflex cables, made by Automarine, so you can always be assured of its quality. Here are links which will take you directly to our cable sections on the website firstly non-Tinned and here is the Tinned Cable section.
Luckily, we always have a great selection of all Marine Cables for you choose from, and if you are not sure exactly what you require one of our knowledgeable sales team will be happy to help. We also stock cable accessories such as Crimps, Lugs and Heatshrink and flexible conduit to complement your cable choice.


01752 484290
marinesales.658@eel.co.uk
marine-electricals.co.uk
new narrowboat design for black prince
new narrowboat design for black prince


aqueduct marina install ev charging points
Aqueduct Marina install 4 electric car charging points which can be used by anyone visiting their boat or simply enjoying a coffee or meal in the marina’s café. The move is made as part of Aqueduct’s aim to become more environmentally friendly.
Read More